In our daily lives, we often need to extract audio from videos, whether it’s to save background music, a lecture, or interview segments as standalone audio files. For Mac users, there are multiple ways to efficiently achieve this. From built-in tools like QuickTime Player to feature-rich third-party software such as VLC and Audacity, each method has its own advantages and limitations, catering to different needs. This article provides a detailed guide to some of the most common methods for audio extraction, along with their pros and cons, helping you choose the tool that best suits your requirements.
Free Ways to Extract Audio from Video on Mac
1. QuickTime Player (Built-in App)
QuickTime Player allows exporting audio from video files in a few clicks.
Steps:
- Open your video file with QuickTime Player.
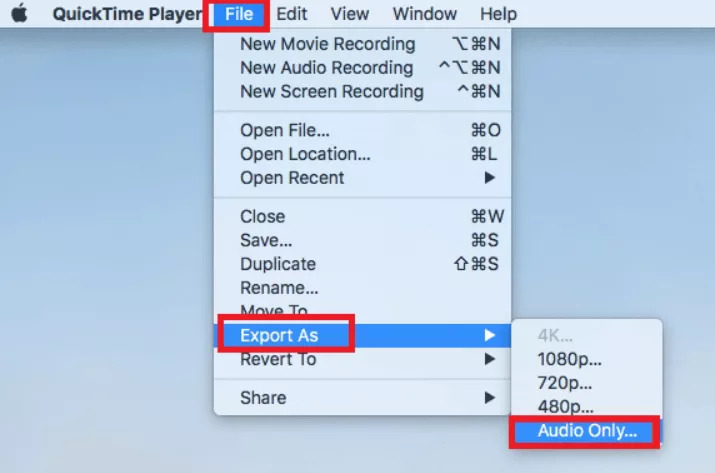
- Click File > Export As > Audio Only.
- Choose a name and save the file as .m4a.
✅ Pros:
- Pre-installed on all Macs (no need to download software).
- Simple and user-friendly.
- Fast export in one step.
❌ Cons:
- Limited to .m4a format.
- No advanced audio editing or customization options.
- Cannot handle batch processing.
2. VLC Media Player (Free)
VLC Media Player not only can play videos on Mac, also can extract audio from video and supports a variety of formats.
Steps:
- Install VLC from VideoLAN.
- Open VLC and go to File > Convert/Stream.
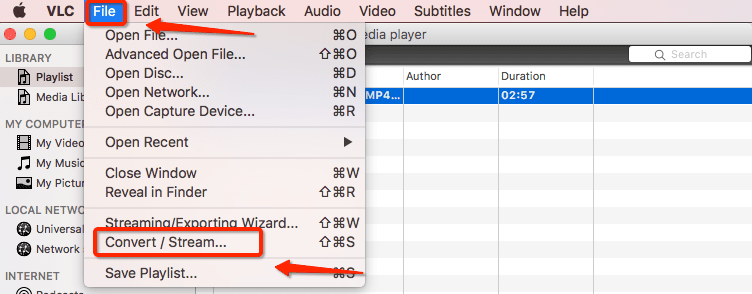
- Click Open Media and load the video.
- Choose Audio Format (MP3, FLAC, etc.) under the Profile dropdown.
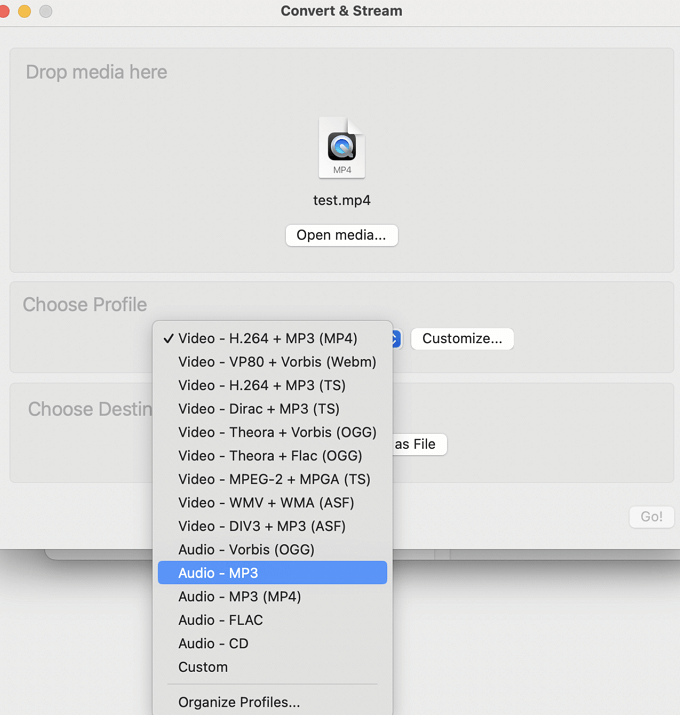
- Click Save as File and select a destination.
✅ Pros:
- Supports many audio formats (MP3, FLAC, WAV, etc.).
- Can handle batch conversions.
- Free and open-source.
❌ Cons:
- Interface can be confusing for new users.
- Conversion process may take longer for larger files.
- Requires installation.
3. iMovie (Free)
If you need light editing before extraction, iMovie can help.
Steps:
- Open iMovie and import your video.
- Right-click the clip on the timeline and select Detach Audio.
- Delete the video track, leaving the audio.
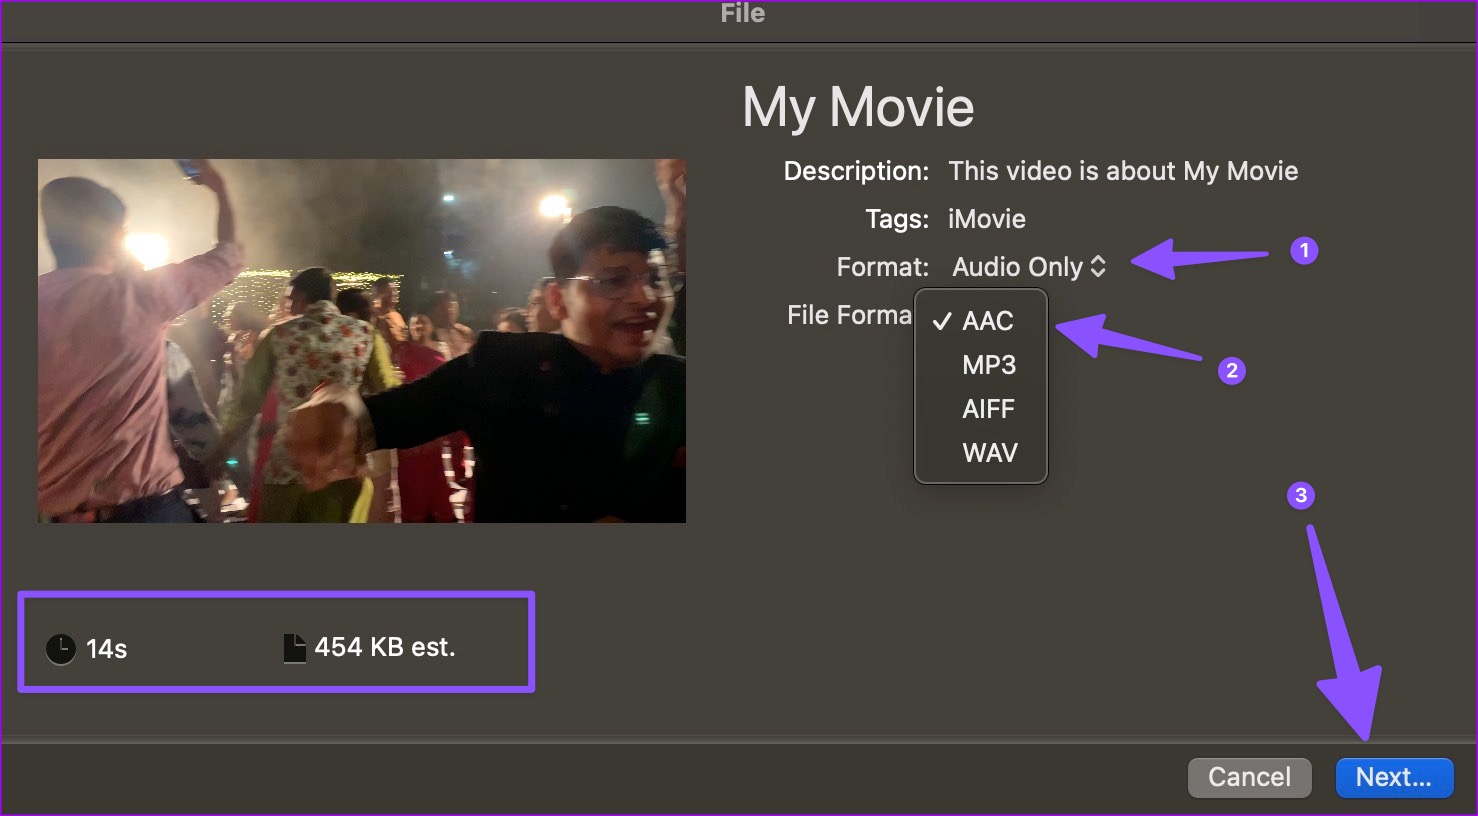
- Click File > Share > File and save the audio in your preferred format.
✅ Pros:
- Great if you need light editing before extracting audio.
- Pre-installed on most Macs.
- User-friendly interface.
❌ Cons:
- Doesn’t support batch processing.
- Limited audio output options (exports as .aif or .m4a).
- Requires removing video manually from timeline, which can be cumbersome for large files.
4. Online Tools (Free, Web-based)
Several websites allow you to upload videos and extract audio directly.
- CloudConvert (cloudconvert.com)
- Online Audio Converter (online-audio-converter.com)
Steps:
- Upload the video.
- Select the output audio format (MP3, WAV, etc.).
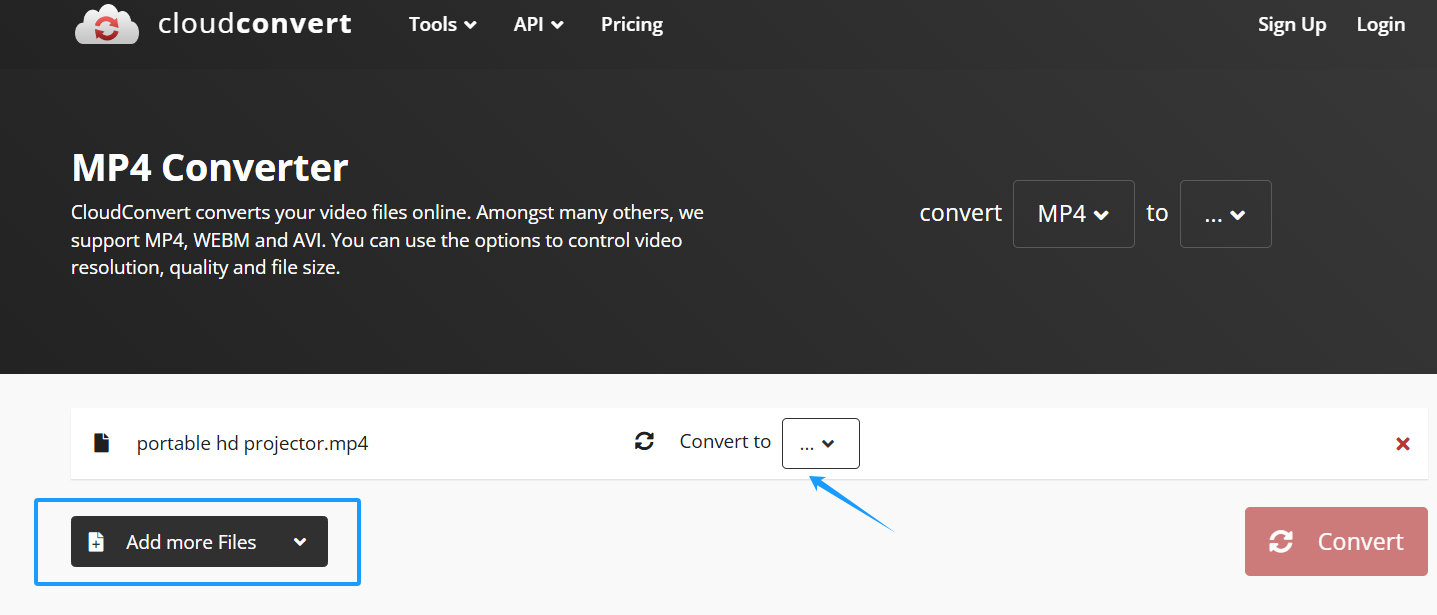
- Download the extracted audio.
Be cautious with sensitive files when using online tools.
✅ Pros:
- No software download required.
- Works on any device with a browser.
- Supports multiple audio formats.
❌ Cons:
- Uploading large videos can be slow.
- Risk of privacy issues (not suitable for sensitive files).
- Dependent on internet speed.
5. Audacity (Free, Open-Source)
Audacity offers more control over audio extraction and editing.
Steps:
- Download Audacity from audacityteam.org.
- Open the video file in Audacity.
- Audacity will extract the audio automatically.
- Click File > Export to save it in MP3, WAV, or other formats.
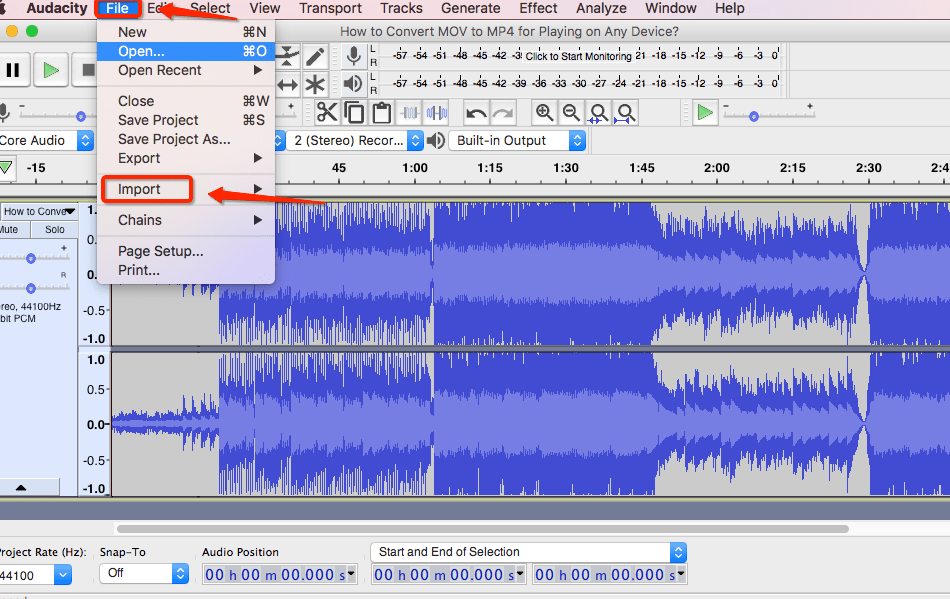
You may need to install the FFmpeg library to import certain video formats.
✅ Pros:
- Supports multiple audio formats.
- Advanced audio editing features (cutting, effects, etc.).
- Free and lightweight.
❌ Cons:
- Requires installation and setup (including FFmpeg library for video formats).
- Interface might feel overwhelming for new users.
- Cannot directly export in all video formats; may require additional plugins.
6. Paid Apps (Advanced Features)
For professional extraction with advanced editing features, try these paid tools:
- Adobe Premiere Pro: Import video, export audio directly.
- Final Cut Pro: Detach audio and export in multiple formats.
- Wondershare UniConverter: Supports batch conversion and many output formats.
✅ Pros:
- Professional-grade tools with batch conversion and editing features.
- Supports a variety of audio formats.
- Customizable export settings (bitrate, channels, etc.).
❌ Cons:
- Expensive (subscription or one-time fee).
- Overkill for basic audio extraction.
- Steeper learning curve, especially for first-time users.
Summary Table
| Method | Pros | Cons |
|---|---|---|
| QuickTime | Pre-installed, easy to use | Limited to .m4a, no batch processing |
| VLC | Many formats, free, batch support | Confusing interface, long conversion |
| iMovie | Light editing, pre-installed | No batch support, limited formats |
| Online Tools | No installation, multiple formats | Privacy risks, internet-dependent |
| Audacity | Advanced editing, free | Complex setup, plugins required |
| Paid Apps | Professional features, batch support | Expensive, learning curve |
Recommendation of Extracting Audio from Video on Mac
Whether you prefer quick and easy solutions or need advanced editing options, there is a suitable audio extraction tool for every Mac user. QuickTime and VLC offer fast, free methods, while iMovie and Audacity are great for those who need light editing features. For professionals, paid software like Final Cut Pro and Wondershare UniConverter provide comprehensive functionality. With this guide, we hope you can find the best approach to make audio extraction efficient and hassle-free.


