Summary: Whether you’re a professional photographer or a newbie starting out, you know that a powerful image editing software is critical to bring out the wonders of your clicks. This is a depth review of Skylum Luminar 4, all based on practical use and test, let’s see if it’s the right photo editing software for you.
Whether you’re a professional photographer or a newbie starting out, you know that a powerful image editing software is critical to bring out the wonders of your clicks. There are hundreds of image editing apps and programs out there – both online and offline offering you a variety of picture editing options. The right software will not only make your picture look appealing but will give you plenty of options to add all kinds of effects, turning an ordinary click into an extraordinary work of art.
Adobe’s Photoshop and Lightroom are the most popular software for professional photographers to edit their images. Lightroom is a more modern program and offers complete image manipulation options, unlike Photoshop which is more of a graphic designing tool. The only caveat to using Adobe is the expensive pricing plan at 19.90/month, so if you’re a photographer by hobby and don’t intend to take it up as a full-time professional, you might find this plan to be super expensive. What’s the best option out there then?
We discovered Skylum Luminar when we were searching for an affordable image editing tool and one that could be as powerful as Lightroom CC. What we loved most was the software’s easy-to-navigate interface and the multiple options it provided for all kinds of image manipulation activities. Here’s an in-depth review.
What is Skylum Luminar 4?
The Skylum Luminar 4 is a product by Skylum (formerly Macphun) known for its image editing programs such as Aurora HDR and Luminar. Luminar 4 is available for both Windows and macOS, so if you’re a Windows user, this review could be helpful for you too.
Luminar 4 is a non-destructive image editing and photo management software for Mac & PC, with impressive AI effects, Luminar 4 can deliver professional results in less time than anything else. The program has over 300 tools and features and dozens of photo filters with customization options and a lot more. With modern and advanced controls, as one of the best photo editor for beginners, Luminar has made image editing so easy that you don’t need to be a professional editor to create stunning images – all you need to be is a good photographer, with plenty of creativity to make the best of your pictures!
Where Do You Get Luminar 4?
To download the Luminar 4, visit the Skylum site and choose from the multiple option plans given. We suggest you opt for the Basic Plan if you’re a professional user since the other two plans (Signature & Creative Pro) simply offer landscapes and other signature looks by professional photographers to bring life to your pictures. If you don’t need any of these additional features, the Basic Plan is still the best option. Good news is, We applied a coupon code (14% off) for all readers, you can apply the coupon code “MACLIBS” when check out to save at least $10 or more. You can read this guide to learn how to apply Luminar promo code step by step.
Luminar 4 Features and Specs
The Luminar 4 boasts of the following features:
1. A friendly interface.
Easy to browse interface that lets you do exactly what you want to without making you navigate through menus and unnecessary options. Right within the working area, you can access the Library, the Edit platform and the tools to transform, rotate or crop your pictures.
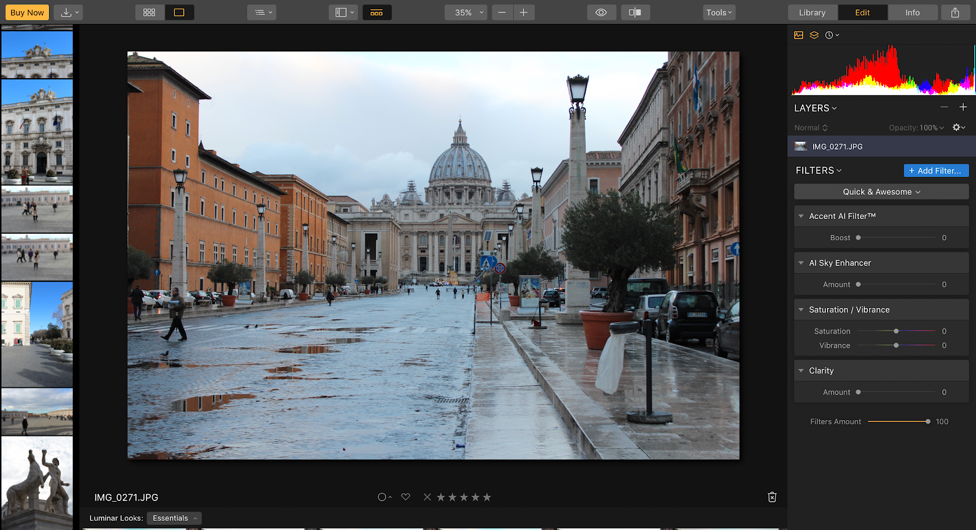
2. Multiple Editing Options.
The Edit option lets you apply filters and adjust them to the kind of saturation, clarity and accent you want. There is even the AI Sky Enhancer option that lets you change the sky according to your preference. Here’s after playing around with the AI Sky Enhancer tool:
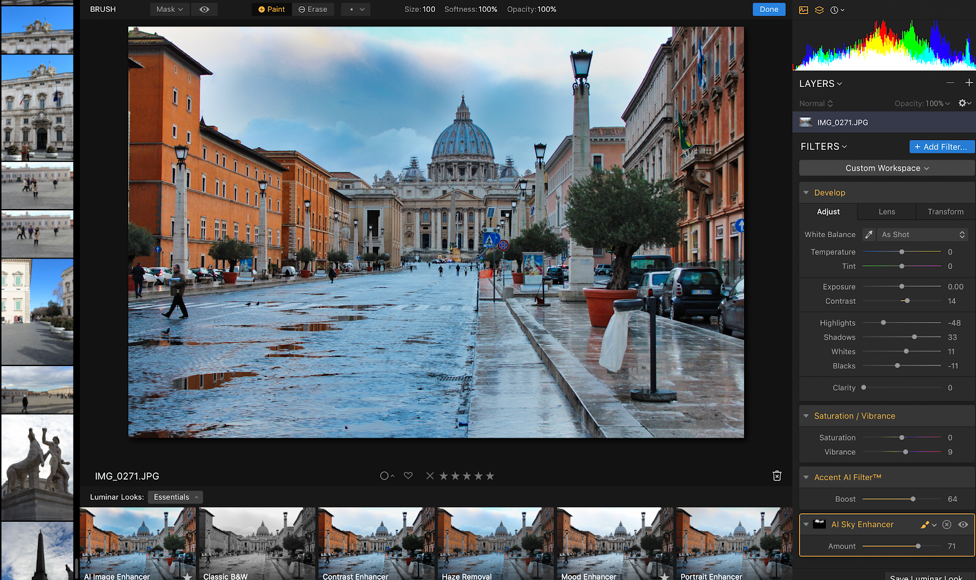
Notice the sky changing towards a darker shade and giving it a more dramatic effect. If you’re good at sky enhancement or manipulation, this is a great tool to help you achieve that. You can make this adjustment using either a Brush tool, a radial mask tool and a gradient tool.
3. The Library Panel.
Supporting a minimalist design, the library panel lets you organize your photos within respective folders for easy access. You can use to hide the panel to give a complete working space for your images. The library lets you rate your pictures and stores them according to favorites or recently modified right within your panel so you can always come back to your favorite photos later without having to navigate through multiple folders or files.
4. Luminar Looks.
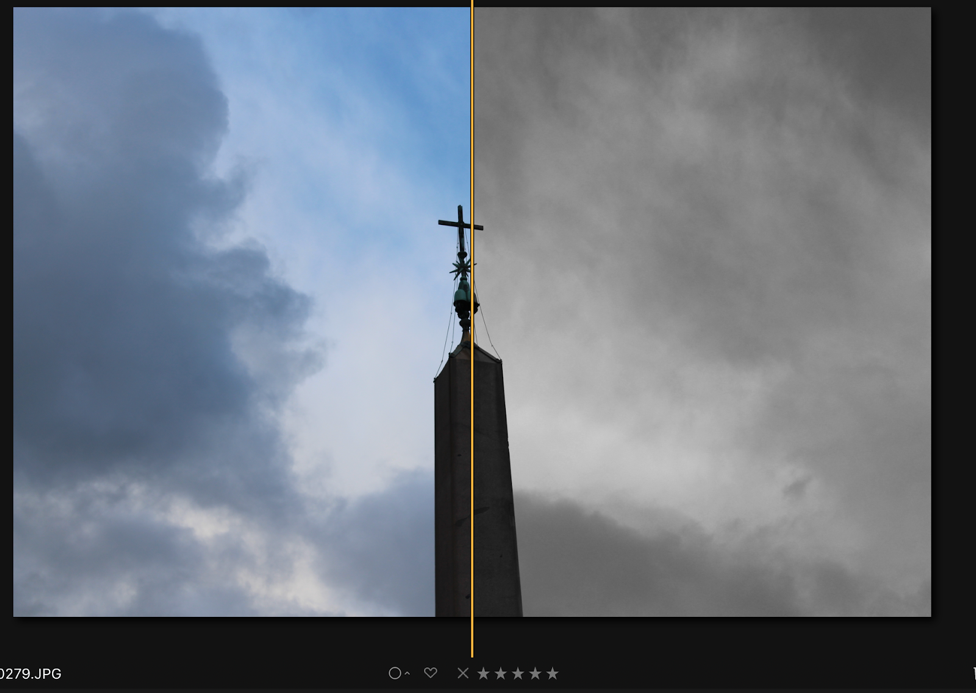
This is a feature any image editing artist would fall in love with. Luminar has multiple, ‘looks’ which you can use and manipulate to create the desired effect. These looks are more than mere filters because they don’t just mask your image, they completely alter the feel of your image giving it a different perspective altogether. There are multiple looks to choose from, with the most popular being the Essentials which has ten options designed for specific enhancements such as a Classic B&W that turns your image into black and white tone, a Contrast Enhancer that lets you adjust the contrast of your image and give it a more dramatic look, a Haze Removal option that removes any fog or mist covering your image, a Mood and Portrait Enhancer that lets you alter the images based on tone, vignette, saturation and vibrance. The remaining looks such as Street has some amazing options like Downtown, Central Park, 60s B&W, Big City, Subway and Faded to give your images a beautiful feel. Here’s the 60s B&W option of the Street Look and it is amazing!

You can further adjust/manipulate this option using the variety of tools given in the Edit section as per your requirements. Enough to say though, the Luminar looks given here has blown us away!
5. The Workspace
Whether you want to professionally edit photos or you want to quickly make an adjustment, the Workplace option provides you with the necessary tools you need to get the job done. You can even save your Workplace option which means the next time you edit photos, you can choose exactly the kind of settings you want and simply use that Workspace to get the job done. The options of the Workspace are:
• Professional: All the tools a professional would need. From adjustment to transformation to lens correction, from saturation control to luminosity and color control, you have all the tools you need to perfect your picture.
• Quick and Awesome: Want to simply boost your picture without going deep? Simply use the AI Filter and move the sliders to the intensity level you need.
• Essentials: Has all the basic tools for anyone to edit an image with saturation optimization, polarizing filters, softness and boost structure, light and dark curves, and vignette options.
• Aerial Photography: A set of tools designed to create a workspace specifically for editing aerial images.
• Black & White: If you work frequently with B&W effects, the B&W workspace allows you to maximize the effects of a B&W option. You have B&W conversion, Structure adjustments, Curves, Split Toning, Soft Glow, Texture Overlay, Graining and Vignette options to choose from.
• Landscape: Similar to the other workspaces, the Landscape workspace gives additional tools such as Polarizing Filter for a darker image tone, a Dehaze option to give a clear sky, a Golden Hour for turning the white part of the sky into a golden hue, LUT Mapping options to change one range of colors into another. You can even import new LUT file if you already have some pre-defined ones. If not, you can use from the multiple LUT options such as Beijing, Manhattan, Tritone and plenty of other choices. The benefit of LUT is that you can with a single click change your modern pictures into a retro stock without having to use other modification tools.
• Portrait: This workspace is ideal for photographers who work with people and want to accentuate the images of a person. With options such as Image Radiance, Dodge&Burn, you can modify images and give them a refined and dramatic look.
• Street: If you’re a street photographer, this workspace has all the tools you need to transform your ordinary click into a mesmirizing street picture. With options as Matte Look, Texture Overlay, Soft Focus you can customize the images according to your preference.
6. Editing Tools.
There are four basic tools provided; Crop, Free Transform, Clone & Stamp and Erase tools. The Eraser tool lets you directly erase things from your images however it was quite slow and required a waiting time of at least 5 to 10 seconds before the erasure was done. Somehow, erasing a part of the picture results in The erase tool first created a clone of some features and required a second round of erasing to actually erase. Slow response time and lack of selection options make it quite rough at the moment. If you do have to remove/erase anything from your images, it’s best to do them on Photoshop.


A figure was erased in the first part, but once removed, a cloning of the image happened and there’s no way you can, ‘re-fix’ this.
Editor’s Note: Luminar 4 photo editor doesn’t handle with complex picture removal well, you can learn how to erase with Luminar 3 photo editor from this video by Jim Nix:
Master Erase + Clone and Stamp in Luminar
Other Important Options:
• You can catalog images you want to edit or change and create a folder accordingly.
• The changes are non-destructive, which means your original images remain the same whereas any edits are saved in Luminar’s own folders. This saves you from accidentally ruining an original image.
• A history panel to track which adjustments have been made to an image as well as quickly perform multiple undos.
• Ability to install Photoshop plugins
• Ability to batch process photos
• Ability to open images directly in other programs
• Ability to support RAW, JPEG, TIFF and other popular files
An Important News for LR/PS Users
If you’re a LightRoom CC or Photoshop user, you don’t have to shift to another software if you’re comfortable with LR/PS but also want the powerful editing features of Luminar. Skylum has announced the Luminar Flex, which is a plugin that can work as a standalone as well as an integrated interface within the LR/PS workspace, giving you complete flexibility as the actual program. According to Skylum, ‘Luminar Flex adds the power of Luminar photo editing experience to most photo editing tools on the market today.’ For many editors and photographers, they are just interested with Luminar’s editing tools and not necessarily with the entire interface. This flexibility of a plugin allows them to have the best of both worlds.
The Good and the Bad about Luminar 4 Photo Editor
Let’s get started with the good stuff:
![]() Great editing options
Great editing options
![]() AI sky replacement to replace sky in mins.
AI sky replacement to replace sky in mins.
![]() Multiple filters designed for professional editing
Multiple filters designed for professional editing
![]() Customizable brush and workspace options
Customizable brush and workspace options
![]() A slick, modern and minimalist interface for efficient working
A slick, modern and minimalist interface for efficient working
![]() Image editing is non-destructive to the original, saving the user from having to make copies before starting
Image editing is non-destructive to the original, saving the user from having to make copies before starting
![]() Batch processing can be done easily
Batch processing can be done easily
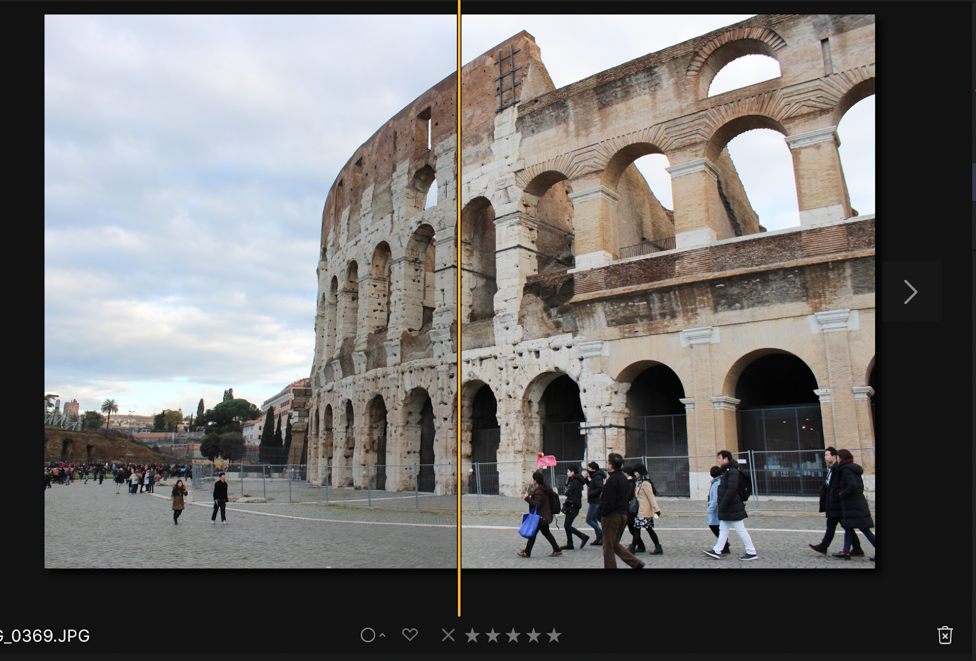
![]() Before and After panels to view your results simultaneously
Before and After panels to view your results simultaneously
![]() Low cost and one-time fee
Low cost and one-time fee
Now just a few of the bad stuff:
![]() Eraser tool needs improvement
Eraser tool needs improvement
![]() The interface may be slow when working with the tools like clone and stamp or eraser
The interface may be slow when working with the tools like clone and stamp or eraser
![]() There is no easy way to return to the main working panel if you are out of it
There is no easy way to return to the main working panel if you are out of it
![]() AI, although a great feature is not really needed for the target audience
AI, although a great feature is not really needed for the target audience
Conclusion
The Luminar 4 is an excellent image editing tool and one that provides you with excellent control and options to make the best of your images. If you’re a professional Photoshop and Lightroom CC user, the Luminar plugin can be a powerful integration and help you edit images with ease. For just $57, the Luminar is a great software for beginners and professionals alike who don’t want to spend a fortune on the other two programs. It should be noted however, that Luminar is still an image manipulation program first and not exactly a powerful editor – which means you should not expect it to perform complex operations like its other competitors. Skylum unveiled a new photo editing software – Luminar AI. Luminar AI is a brand new photo-editing application that has been rebuilt completely under the hood. The software is the first photo editor of its kind that is completely driven by an AI engine. You can learn Luminar AI more from its official page.
Skylum Luminar 4
$57 with Coupon "MACLIBS"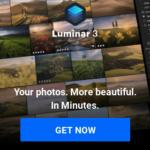
Pros
- 1. Great editing options
- 2. Multiple filters designed for professional editing
- 3. Customizable brush and workspace options
- 4. Image editing is non-destructive to the original, saving the user from having to make copies before starting
- 5. Batch processing can be done easily
Cons
- 1. Eraser tool needs improvement
- 2. The interface may be slow when working with the tools like clone and stamp or eraser
- 3. There is no easy way to return to the main working panel if you are out of it


Luminar absolutely the best photo editor for every level users, it’s really easy to stunning photos in mins.
besides, I love your blog and find most of your post’s to be just what I’m looking for. Thank you!